


First steps with Django - Part 2
Learn Django through an example: create a blog


First of all
Welcome on the second part of the tutorial about discovering Django with an example.
If you didn't read the first part:
The source code of the first part is
Be sure that you understood all the concepts of the first part. If not, feel free to go back on it until you're comfortable.
Add some design
Ok our blog was desperately ugly. We will not make here a wonderful design, but we can add a little bit of CSS to make it cleaner. And that will be a good reason to introduce the statics
The statics
The statics are all the files used by your website which are not related to Django. For example we will need some CSS, Javascript, images etc. All these files are static files. We will see now how to implement them in our project.
First of all, we need a place to store them. By default Django didn't create any directory for the statics, we will have to create it ourselves. By convention, the statics folder is named static and is placed in our RootFolder at the same level than manage.py. Let's create this directory and 3 others inside it: css, js and images. In the folder css create a new file named bootstrap.min.css and copy this inside.
Still in the css folder create another file named blog.css and copy this inside.
I will not go through the CSS files, it's not the subject of this tutorial but at least we will have some CSS to apply on our website. Now we will need to include them in our entire website. So we will import them in our main.html template. Here is what the template will look like now:
{% load static %}
<!DOCTYPE html>
<html lang="en">
<head>
    <meta charset="utf-8">
    <meta name="viewport" content="width=device-width, initial-scale=1, shrink-to-fit=no">
    <meta name="description" content="">
    <meta name="author" content="">
    <title>My awesome blog</title>
    <link href="{% static 'css/bootstrap.min.css' %}" rel="stylesheet">
    <link href="https://fonts.googleapis.com/css?family=Playfair+Display:700,900" rel="stylesheet">
    <link href="{% static 'css/blog.css' %}" rel="stylesheet">
</head>
<body>
<div class="container">
    <header class="blog-header py-3">
        <div class="row flex-nowrap justify-content-between align-items-center">
            <div class="col-12 text-center">
                <a class="blog-header-logo text-dark" href="#">My awesome blog</a>
            </div>
        </div>
    </header>
    {% block content %}
    {% endblock %}
</div>
</body>
</html>
I will pass on the new divs and class they are here only to apply the CSS and make our application more pretty. But other things appeared and are important to understand. The very first line {% load static %} is a directive telling to Django that we want to import it. This will permit you to call the statics in your HTML page. I will not detail how it works but trust me if you don't put that on the top of your file, you will not be able to use what I will explain now.
The other difference is for example: <link href="{% static 'css/blog.css' %}" rel="stylesheet"> It's a CSS link as we know but we don't put the path to the static folders. In fact using {% static %} offer to only precise the path from the static folder, nevermind where it is. The big advantage is anywhere you will have an HTML template, you will not have to calculate the good path. As well if you move your statics, you will not have to change all the files.
But Django still doesn't know where to find them, we will have to specify it. For that go in your settings.py file. At the bottom of this file, add theses lines:
STATICFILES_DIRS = [
    BASE_DIR / "static",
]
This constant is a list of folders. When you ask for a static, Django will try to find it in all these folders, and return the first matching file found.
If you reload your browser, you will already see some differences. We will as well make some changes in our homepage.html:
{% extends 'main.html' %}
{% block content %}
    <div class="row mt-3">
        {% if posts %}
            {% for post in posts %}
                <div class="col-md-6">
                    <div class="card flex-md-row mb-4 box-shadow h-md-250">
                        <div class="card-body d-flex flex-column align-items-start">
                            <h3 class="mb-0">
                                <a class="text-dark" href="#">{{ post.title }}</a>
                            </h3>
                            <p class="card-text mb-auto">{{ post.content|truncatewords:15 }}</p>
                            <a href="#">Continue reading</a>
                        </div>
                    </div>
                </div>
            {% endfor %}
        {% else %}
            <h4 class="text-warning"> There is nothing to see here </h4>
        {% endif %}
    </div>
{% endblock %}
Just html changes here except this {{ post.content|truncatewords:15 }}. This is a filter. Django provide few filters to work easily on our templates. This filter will display the 15 first words of post.content followed by ... if there is more than 15 words. Quite useful right?
Cool now you can reload your browser, it's better right? Everytime you will have css, javascript or images for your design, think about the statics and use them.
Add a post
Now it's time to add a post, but adding it directly in the database is really not a good idea. It would be really better to add it thanks to a form. Thanksfuly, Django knows it and provide us some very easy ways to create a form.
My first form
With Django, we can declare and store our forms in a file named forms.py in each application. We will describe a form kind of the same way we declare a model, and Django will take care of the display. But Django can do better for us, our form has to be linked to our model because we want to save the form data in the database. For that Django can generate a form from this model. Let see that with an example, in your application package create a new file forms.py in this file we will add:
from django import forms
from blog.models import Post


class PostForm(forms.ModelForm):
    class Meta:
        model = Post
        fields = ['title', 'content']
So each form is declared as a class. Our class here inherits from forms.ModelForm, this tells to Django that we want this form to be generated automatically from a model, Then in it we add a class Meta, where we will give some informations for Django to generate the form like which model we use and which fields have to be filled by the user (remember the 2 datetime fields we made them filled automatically).
Display the form
To display our beautiful new form, we will need an instance of it in our template, remember when we want to give something to the template, we have to put it in the context of the view calling this template. For now we will display the form on the welcome page, below the post list. So we have to edit our list_posts view:
from django.shortcuts import render

from blog.forms import PostForm
from blog.models import Post


def list_posts(request):
    posts = Post.objects.all()
    form = PostForm()
    return render(request, 'homepage.html', locals())
So few changes appear here. First we create a var named form (the name doesn't have any importance).
And in our render there is something new: locals() replaced our context. In fact locals() will create a dictionary containing all the variables of our function with the format {'name_of_the_var': 'value_of_the_var'}. That is very useful but be careful, use it only when all the vars of our function need to be transmitted to the templates.
Now we will display this form in our template homepage.html:
{% extends 'main.html' %}
{% block content %}
    <div class="row mt-3">
        {% if posts %}
            {% for post in posts %}
                <div class="col-md-6">
                    <div class="card flex-md-row mb-4 box-shadow h-md-250">
                        <div class="card-body d-flex flex-column align-items-start">
                            <h3 class="mb-0">
                                <a class="text-dark" href="#">{{ post.title }}</a>
                            </h3>
                            <p class="card-text mb-auto">{{ post.content|truncatewords:15 }}</p>
                            <a href="#">Continue reading</a>
                        </div>
                    </div>
                </div>
            {% endfor %}
        {% else %}
            <h4 class="text-warning"> There is nothing to see here </h4>
        {% endif %}
    </div>
<!-- here we add our form -->
    <div class="row mt-3">
        <div class="col-md-6 offset-md-3">
            {{ form }}
        </div>
    </div>
{% endblock %}
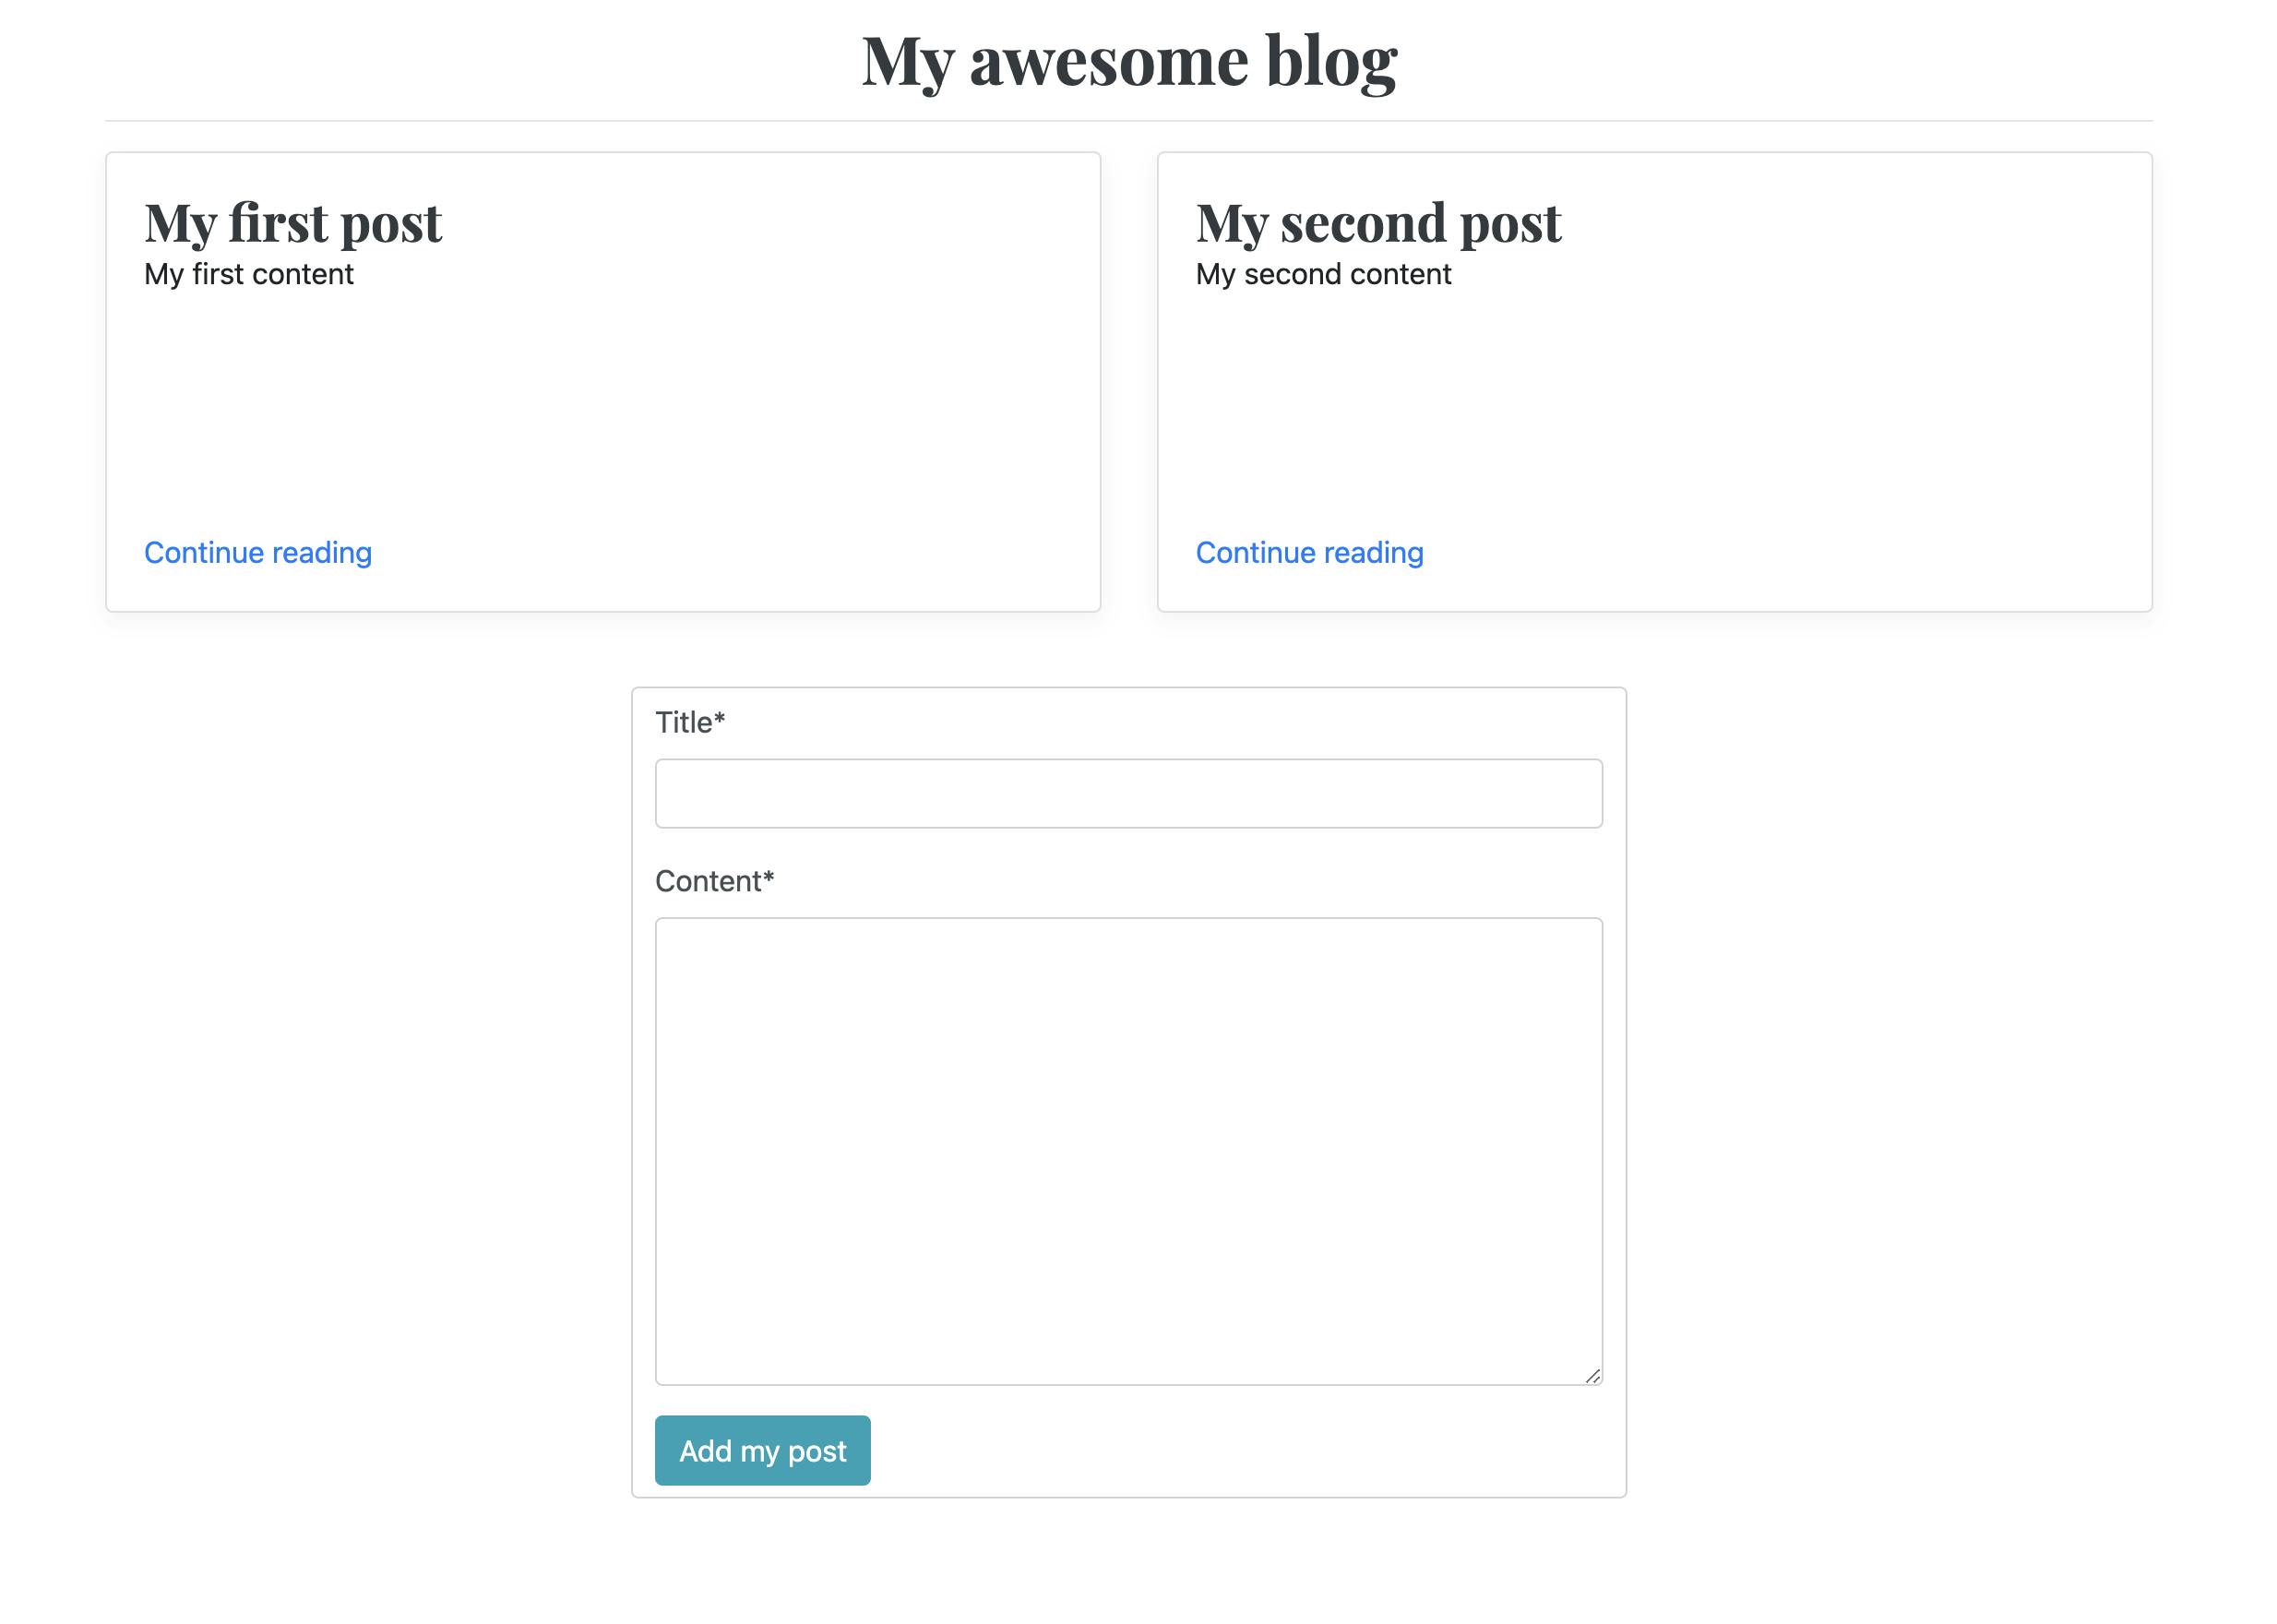
To display the form we just have to display the var containing the form and Django will do everything else. If you refresh your browser, you will see our form is here.
When Django displays a form, it displays only the fields. We will need to add the <form> and the submit button ourselves like this:
[...]
<div class="row mt-3">
    <div class="col-md-6 offset-md-3">
        <form class="form-control" action="{% url 'list_posts' %}" method="post">
            {% csrf_token %}
            {{ form }}
            <input type="submit" class="btn btn-info" value="Add my post"/>
        </form>
    </div>
</div>
[...]
The submit button is quite classic but 2 new directives appeared here:
{% url 'list_posts' %}is automatically generating the url for the view named "list_posts", remember the name is the third attribute in ourpath()in the urls.{% csrf_token %}This is a mandatory in any forms you display. It's used by Django to be sure that the form is sent from this page and that nobody tried to submit a form coming from somewhere else. If you don't put it, Django will raise an exception.
Display our form better
Ok so right now our form doesn't look very good it seems that django try to put everything on one line. To make it look better we can display it with a <p></p> around each field. You just have to ask Django to do so:
[...]
{{ form.as_p }}
[...]
Cool now the form looks way better. But it doesn't really follow the bootstrap design. There is few ways to do so, but the easiest one is to use CrispyForm. CrispyForm is a library taking care of the design of your forms. It's very powerful and completely customisable. But for our tutorial we will use the basics. So first we will need to install it in ou virtual environment:
pip3 install django-crispy-forms
Then we will add it to the installed apps in our file settings.py:
[...]
INSTALLED_APPS = [
    'django.contrib.admin',
    'django.contrib.auth',
    'django.contrib.contenttypes',
    'django.contrib.sessions',
    'django.contrib.messages',
    'django.contrib.staticfiles',
    'blog',
    'crispy_forms',
]
[...]
CRISPY_TEMPLATE_PACK = 'bootstrap4'
[...]
So we added crispy forms to the installed apps and as well we made a constant to declare which template pack we will use, in our case we will use bootstrap4.
The last step will be to tell CrispyForms to take care of the render of the form. To do so we will add something to our template homepage.html:
{% extends 'main.html' %}
{% load crispy_forms_tags %}
{% block content %}
    <div class="row mt-3">
        {% if posts %}
            {% for post in posts %}
                <div class="col-md-6">
                    <div class="card flex-md-row mb-4 box-shadow h-md-250">
                        <div class="card-body d-flex flex-column align-items-start">
                            <h3 class="mb-0">
                                <a class="text-dark" href="#">{{ post.title }}</a>
                            </h3>
                            <p class="card-text mb-auto">{{ post.content|truncatewords:15 }}</p>
                            <a href="#">Continue reading</a>
                        </div>
                    </div>
                </div>
            {% endfor %}
        {% else %}
            <h4 class="text-warning"> There is nothing to see here </h4>
        {% endif %}
    </div>
    <div class="row mt-3">
        <div class="col-md-6 offset-md-3">
            <form class="form-control" action="{% url 'list_posts' %}" method="post">
                {% csrf_token %}
                {{ form|crispy }}
                <input type="submit" class="btn btn-info" value="Add my post"/>
            </form>
        </div>
    </div>
{% endblock %}
The first thing we did is to load the crispy_forms_tags, like when we did load the static, this will allow us to use the template filters of CrispyForms in our template. And we do so, we just add the filter crispy to the form display and removed the as_p because CrispyForm will do it itself, and that's it, if you refresh your browser, you can see the difference now.
Work with the data
If you submit your form now ... nothing will happen. In fact the form is submitted to our view, but the view doesn't do anything with it, and return the page as usual. We will have to treat the form in our view. The first thing to do, is to bind the form. Binding a form is basically filling it with the data coming with the request. For now when we create the form instance, it's unbinded, we didn't give any data to the form so the form is empty. What we will do is to create the form and bind it with the data in request if the request is a POST request, if not let it unbinded. In your view:
form = PostForm(request.POST if request.method == 'POST' else None)
It's quite straightforward but let explain a little bit more what we did. A form can take few parameters when we create an instance. The first one is the data if we want to bind the form. In our case, if the request.method is a post (so if we submitted a form) we will bind the form with the data sent (request.POST) if not we just put None and the form will not be binded. In the end, we will have a form binded if the request is a POST or an empty one if the request is not. If you try already to post something yo will see, the form will not be emptied anymore. Because the form we transmit to the view is binded with data, these data will appear in the fields.
Now, if the form is binded with data, we want to save them. Look at the view:
def list_posts(request):
    posts = Post.objects.all()
    form = PostForm(request.POST if request.method == 'POST' else None)
    if request.method == 'POST':
        if form.is_valid():
            form.save()
    return render(request, 'homepage.html', locals())
In case our request is a POST, so if we submitted a form, we will check if the form is valid. This, form.is_valid() will check the data returned by the form. If everything is correct it will return True if there is a problem (for example a mandatory field empty, or an integer field which contain text), it will return False.
For that Django will check the data needed in the database for this model and check the data present in the form.
And if the form is valid, we want to save it. Our form is a ModelForm which means that Django knows already where to save these data, and callind the method save() directly on the form will create an instance of our model Post, fill it with the data of our form, and save it.
Let's try it if we submit the form, our new article appear:
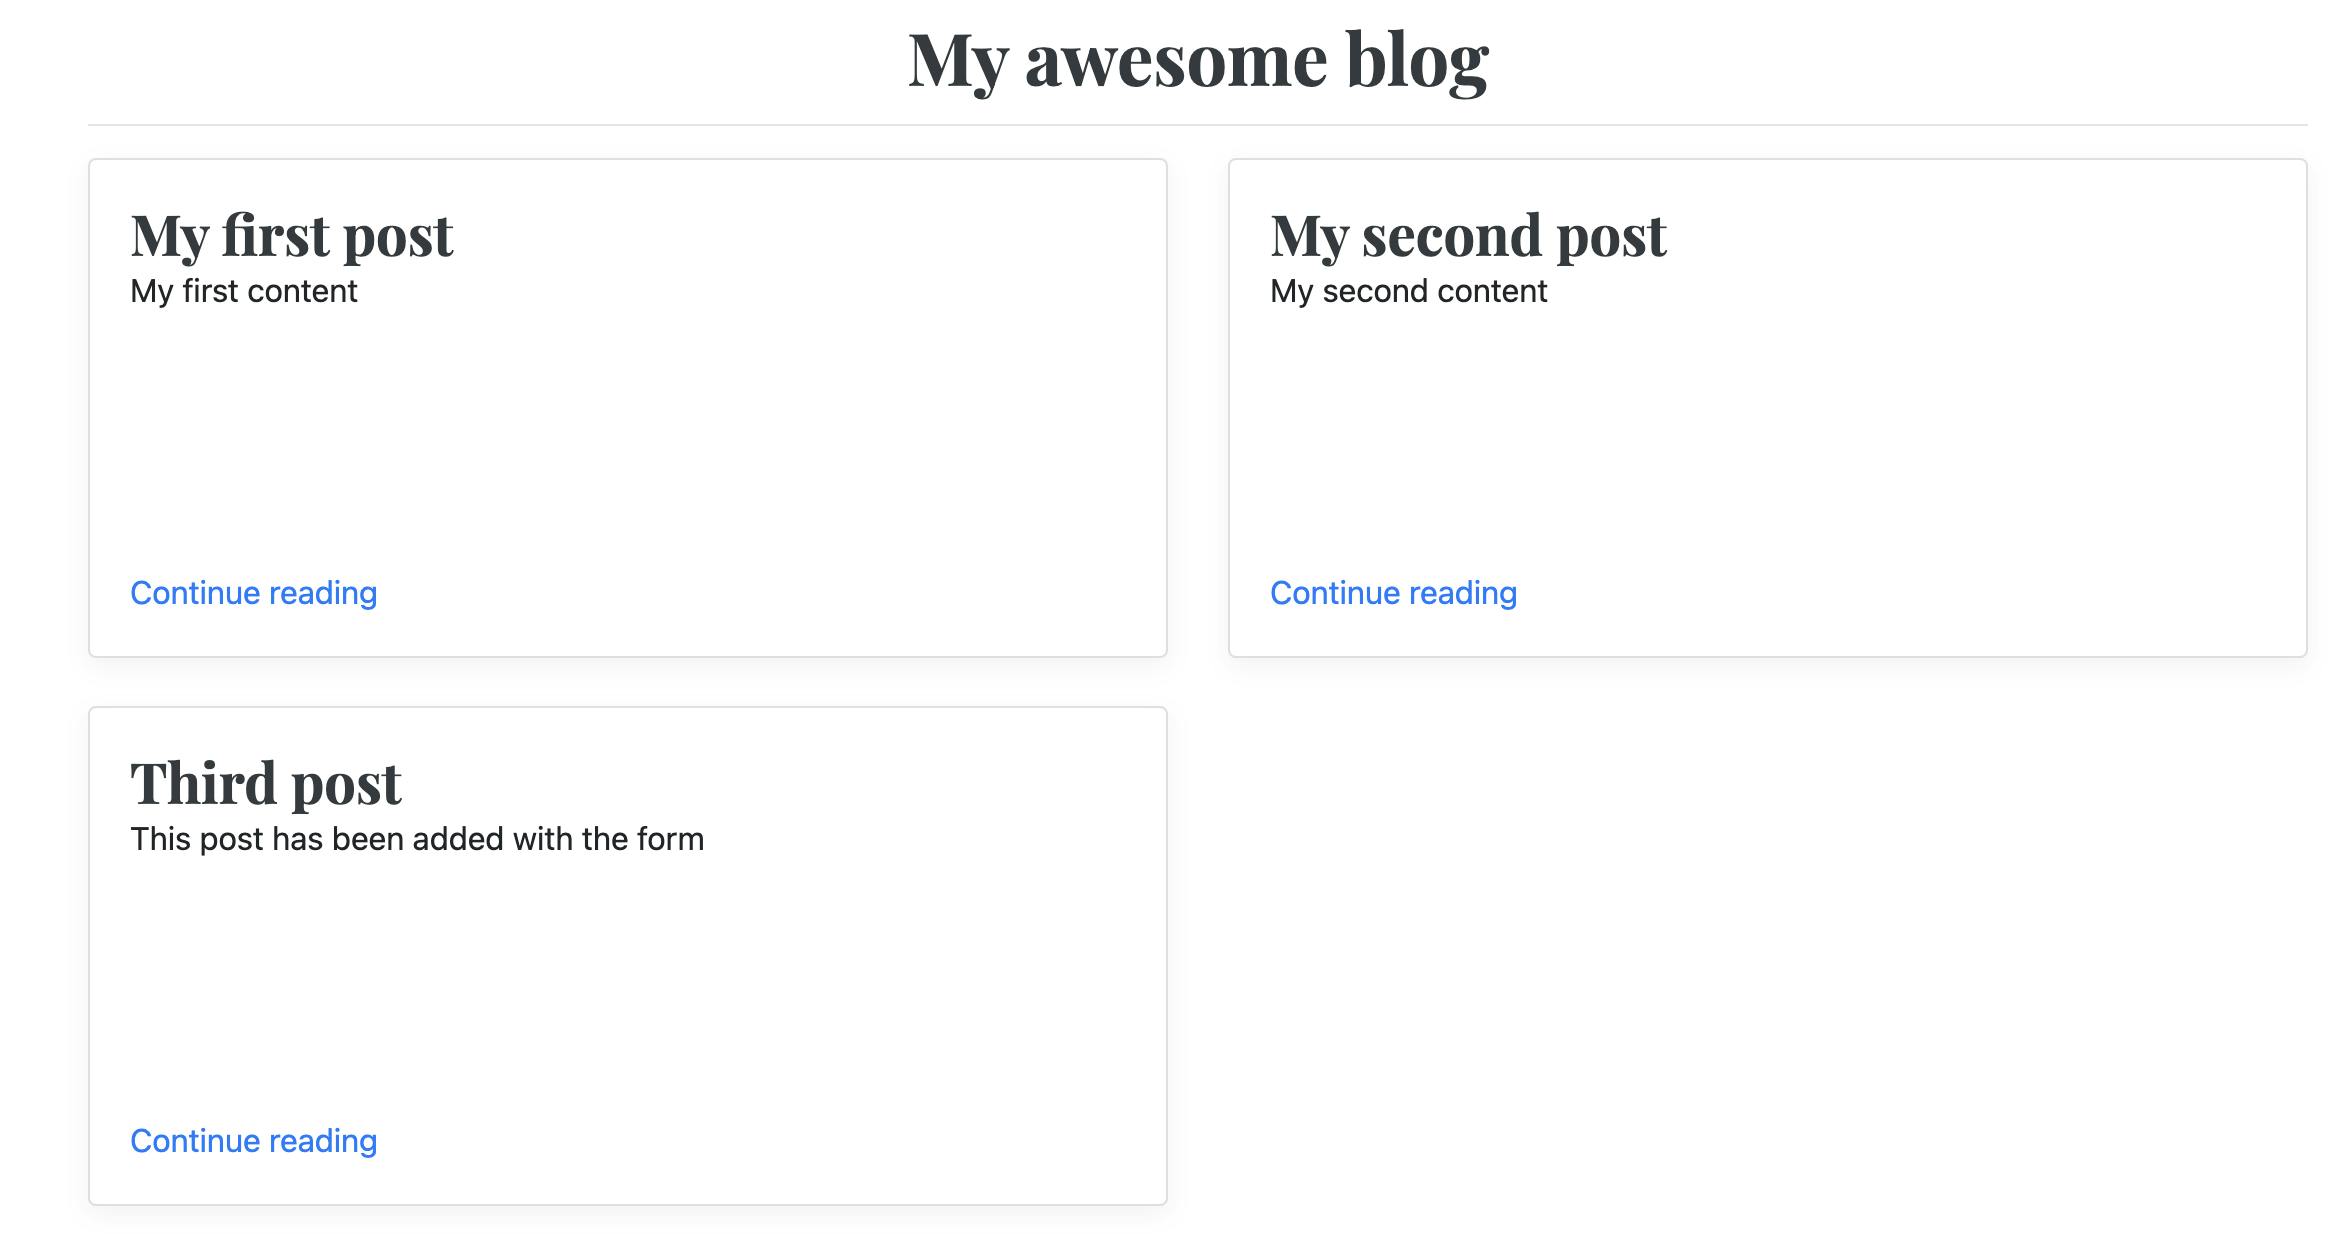 Wait, the form is not empty it still have the data we submitted
Yes because we didn't unbind the form. So if we save our form, we need to unbind it. To do so we will just create a brand new and empty form to replace the binded one:
Wait, the form is not empty it still have the data we submitted
Yes because we didn't unbind the form. So if we save our form, we need to unbind it. To do so we will just create a brand new and empty form to replace the binded one:
    if request.method == 'POST':
        if form.is_valid():
            form.save()
            form = PostForm()
    return render(request, 'homepage.html', locals())
And now it will be better.
Deal with the errors
Django implement the error messages if the form is not valid, and ... it will display it. To understand let's create an error. On your browser right click on the field title then inspect element. You will see the html of your page, remove from here the required in your title field, and try to submit the form leaving the title empty:
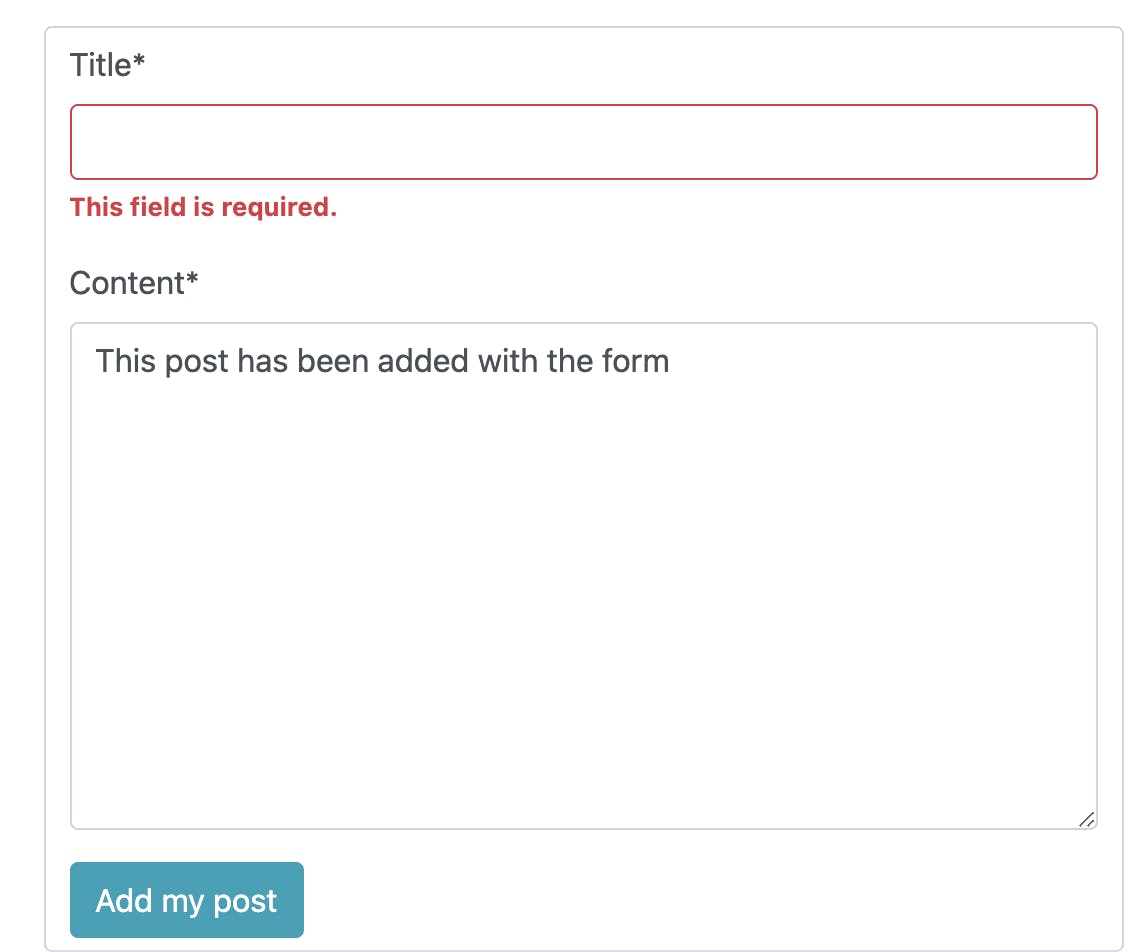 Django display automatically the error and CrispyForms display it well.
Custom the labels and error messages
By default, the label for each field is the name of the field in the database (replacing _ with spaces), but sometimes we want a custom label, but we don't want to rename the field in our database. Django make it easy again by modifying our form class:
from django import forms
from blog.models import Post
class PostForm(forms.ModelForm):
class Meta:
model = Post
fields = ['title', 'content']
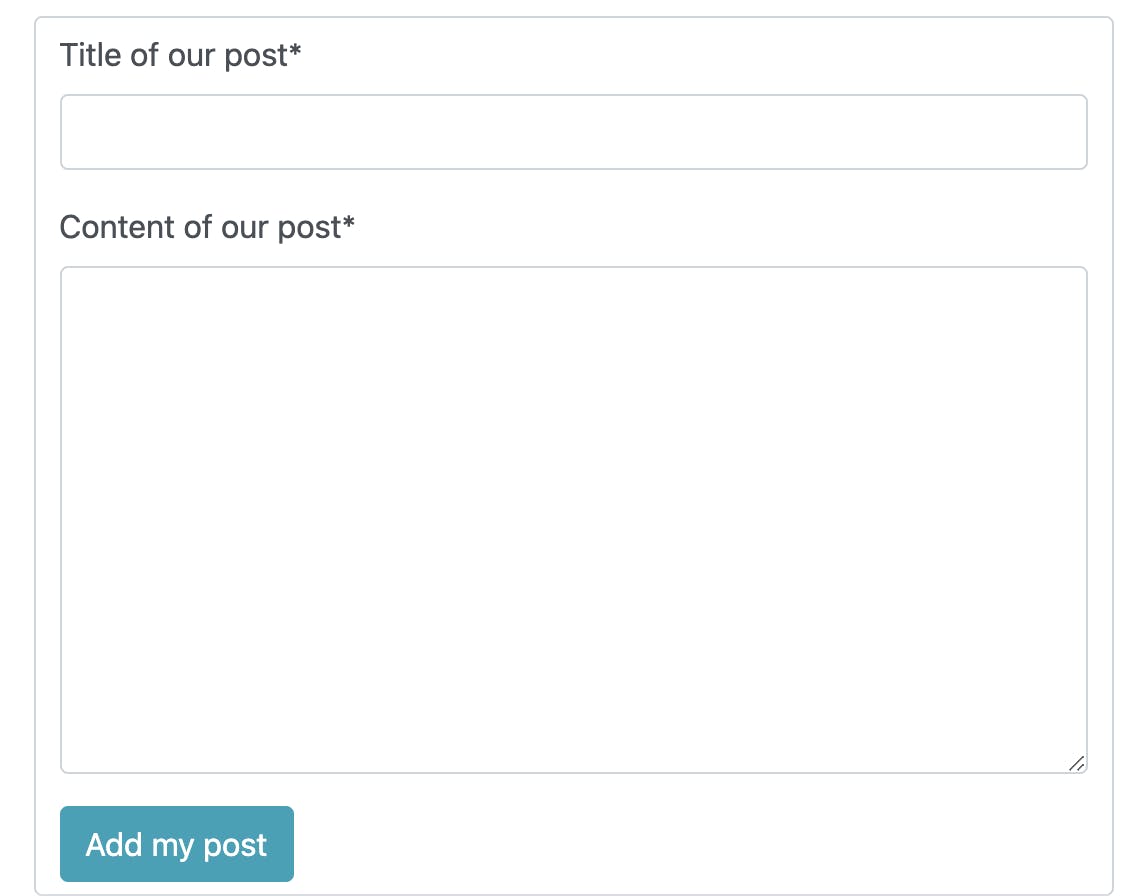
labels = {
"title": "Title of our post",
"content": "Content of our post"
}
We just added a dictionary in the meta of our form class named labels. In it we use the name of the field as a key, and the new label as a value. Nothing more to do:
To make the error message label custom it will be a little more complicated. We need to redefine the field of the form. By default, Django will use a certain type of field for a given field in the database, for example a CharField in the database will give a TextField in the form. We don't want to change that but we want to add some options to this form field so we will have to redefine it in our form:
from django import forms

from blog.models import Post


class PostForm(forms.ModelForm):
    title = forms.CharField(error_messages={'required': 'This field has to be filled'})

    class Meta:
        model = Post
        fields = ['title', 'content']
        labels = {
            "title": "Title of our post",
            "content": "Content of our post"
        }
In our form we redefined the field title but we added a dictionary error_messages as a first parameter. In it we can deal with the different errors which can make this field invalid like required if the field is required but empty or max_length if the content is longer than the max length of the field.
Display a post
Now the home page display our posts and a part of the content but it can be great to be able to display the full post right? For that we will create a new page. You already know how to do it:
- Create the model
- Create the URL
- Create the view
- Create the template
In this case no model is needed because we will use the model we already created. Ok so for the URL you already know how to do, in our blog application urls:
from blog import views
from django.urls import path

urlpatterns = [
    path('', views.list_posts, name='list_posts'),
    path('post', views.display_post, name='display_post'),
]
Now let's create the view in our views.py in our application blog:
def display_post(request):
    return render(request, 'post.html')
For now our view will just return the template, we will do some edits later.
For the template, we will create a new html file named post.html in our application templates folder:
{% extends 'main.html' %}
{% block content %}
    <div class="row mt-3">
        <div class="col-md-8 offset-2">
            <h1>{{ post.title }}</h1>
        </div>
    </div>
    <div class="row mt-3">
        <div class="col-md-8 offset-2">
            <h1>{{ post.content }}</h1>
        </div>
    </div>
{% endblock %}
So our template is waiting for a variable named post. If this variable doesn't exist it will not raise an error, it will just not display it.
So now we will have to give the post to our template to display it. For that, the view needs to know which post we want. That's the perfect moment to use the parameters. Look at this view:
def display_post(request, post_id):
    post = Post.objects.get(id=post_id)
    return render(request, 'post.html', locals())
Now our view is waiting for a parameter containing the id of the post to display, than the view ask this post to the model. We already saw that except that the method .get() from the model manager can take as many arguments each argument is a filter to find the data we need. Each parameter name is the name of a field, and the value is the value we need. Remember, Django creates automatically the ids in the database so we can filter using the id. The most important is that .get() will raise an error if it find more or less than 1 result.
And finally we return this to the template. Seems perfect but .. how to give the id to our view?, we will do that in the urls, look at this:
from blog import views
from django.urls import path

urlpatterns = [
    path('', views.list_posts, name='list_posts'),
    path('post/<int:post_id>', views.display_post, name='display_post'),
]
We changed the path for this page adding /<int:post_id>. So what does that mean, it means that the view display_post need a parameter named post_id containing only a integer. With Django when you give a parameter to a view, these parameters are in the url. So you see where we go? If we call our url post/1 we should get the post with the id 1. But of course we will not ask our visitors to guess it. We will create a link for each post in our home page:
[...]
{% for post in posts %}
     <div class="col-md-6">
         <div class="card flex-md-row mb-4 box-shadow h-md-250">
             <div class="card-body d-flex flex-column align-items-start">
                 <h3 class="mb-0">
                     <a class="text-dark" href="{% url 'display_post' post_id=post.id %}">
                         {{ post.title }}
                      </a>
                 </h3>
                 <p class="card-text mb-auto">
                     {{ post.content|truncatewords:15 }}
                 </p>
                 <a href="{% url 'display_post' post_id=post.id %}">Continue reading</a>
              </div>
          </div>
      </div>
{% endfor %}
[...]
Here, the only thing we changed is the href attribute of the link on the title and the one on the Continue Reading link. We replaced by the url to display the post. When you use {% url %} and want to give parameters, they are just following the name of the url and are named according to the parameter needed in the view.
Enough for today
Now we can create posts, display them on the homepage, we know how to deal with the statics, how to do a form and save the data. Our blog start to look like a blog. In the third part of this tutorial we will go further, learning to update a post, make categories, use the authentication system, the permissions etc.
You can find the repository with the code of this part here: