


Setup PyCharm to use a Django project in docker
How to configure Pycharm to use a docker python interpreter, Django and PostgreSQL


To be sure every developer work with the same controlled development environment, more and more teams use docker. That way every developer will work on the same environment, regardless of their operating system. Using docker as a development environment decrease also the time needed for a new developer to be ready to code. Pycharm is one of the most used python IDE in the world, and implemented docker as development environment. Today we will see how to configure a project in our new IDE.
The environment
Before starting the configuration, you'll need to install few dependencies on your computer:
- PyCharm available for download here
- Docker desktop available here
- A Django project using PostgreSQL. You can use the project we created in the tutorial "First steps with Django"
Setup the interpreter docker
We want now to have a docker for PostgreSQL, another docker for the python interpreter, we want also the data from the database to be persistent and finally to have access to the code to edit it. We will start with cloning the application and create a dockerfile for our python docker. If you don't know what I'm talking about, you can have a look on the tutorial "Deploying an application Django with PostgreSQL and Docker.
git clone https://gitlab.com/code-with-oreo/django-part-3.git .
Then create a file named Dockerfile:
FROM python:3.8.3-alpine

WORKDIR /app

ENV PYTHONDONTWRITEBYTECODE 1
ENV PYTHONUNBUFFERED 1

RUN apk update && apk add postgresql-dev gcc python3-dev musl-dev
RUN pip install --upgrade pip
COPY requirements.txt /app/requirements.txt
RUN pip install -r requirements.txt

EXPOSE 8000

CMD ["python", "manage.py", "runserver", "0.0.0.0:8000"]
I suppose you understand this file as we explained it in the tutorial about deployment. This Dockerfile will create the docker which will run our python interpreter. For PostgreSQL, we don't need a Dockerfile, the official image will be enough for us.
Setup the docker compose file
As we will have two dockers to run together, we will need docker-compose to manage them. At the root of the project, create a file docker-compose.yml:
version: '3'
services:
  web:
    build: .
    container_name: MyWebApp
    ports:
      - "8000:8000"
    volumes:
      - ./:/app
    links:
      - db

  db:
    image: "postgres:latest"
    container_name: MyDb
    volumes:
      - db-data:/var/lib/postgresql/data
    environment:
      POSTGRES_PASSWORD: yourpassword

volumes:
  db-data:
Same than for the Dockerfile you probably understand this file. The object is not about dockerizing an application but how to configure Pycharm.
We will as well make some modification on our settings file (my_blog/settings.py):
[...]
ALLOWED_HOSTS = ['*'] #to allow access in local
[...]
DATABASES = {
    'default': {
        'ENGINE': 'django.db.backends.postgresql',
        'NAME': 'postgres',
        'USER': 'postgres',
        'PASSWORD': 'yourpassword',
        'HOST': 'db',
        'PORT': '5432'
    }
}
[...]
Now everything is ready but if you run your docker compose you will have an error because the database is empty. We can fix that in the terminal but let's configure Pycharm and do it through the IDE.
Configure a new interpreter in Pycharm
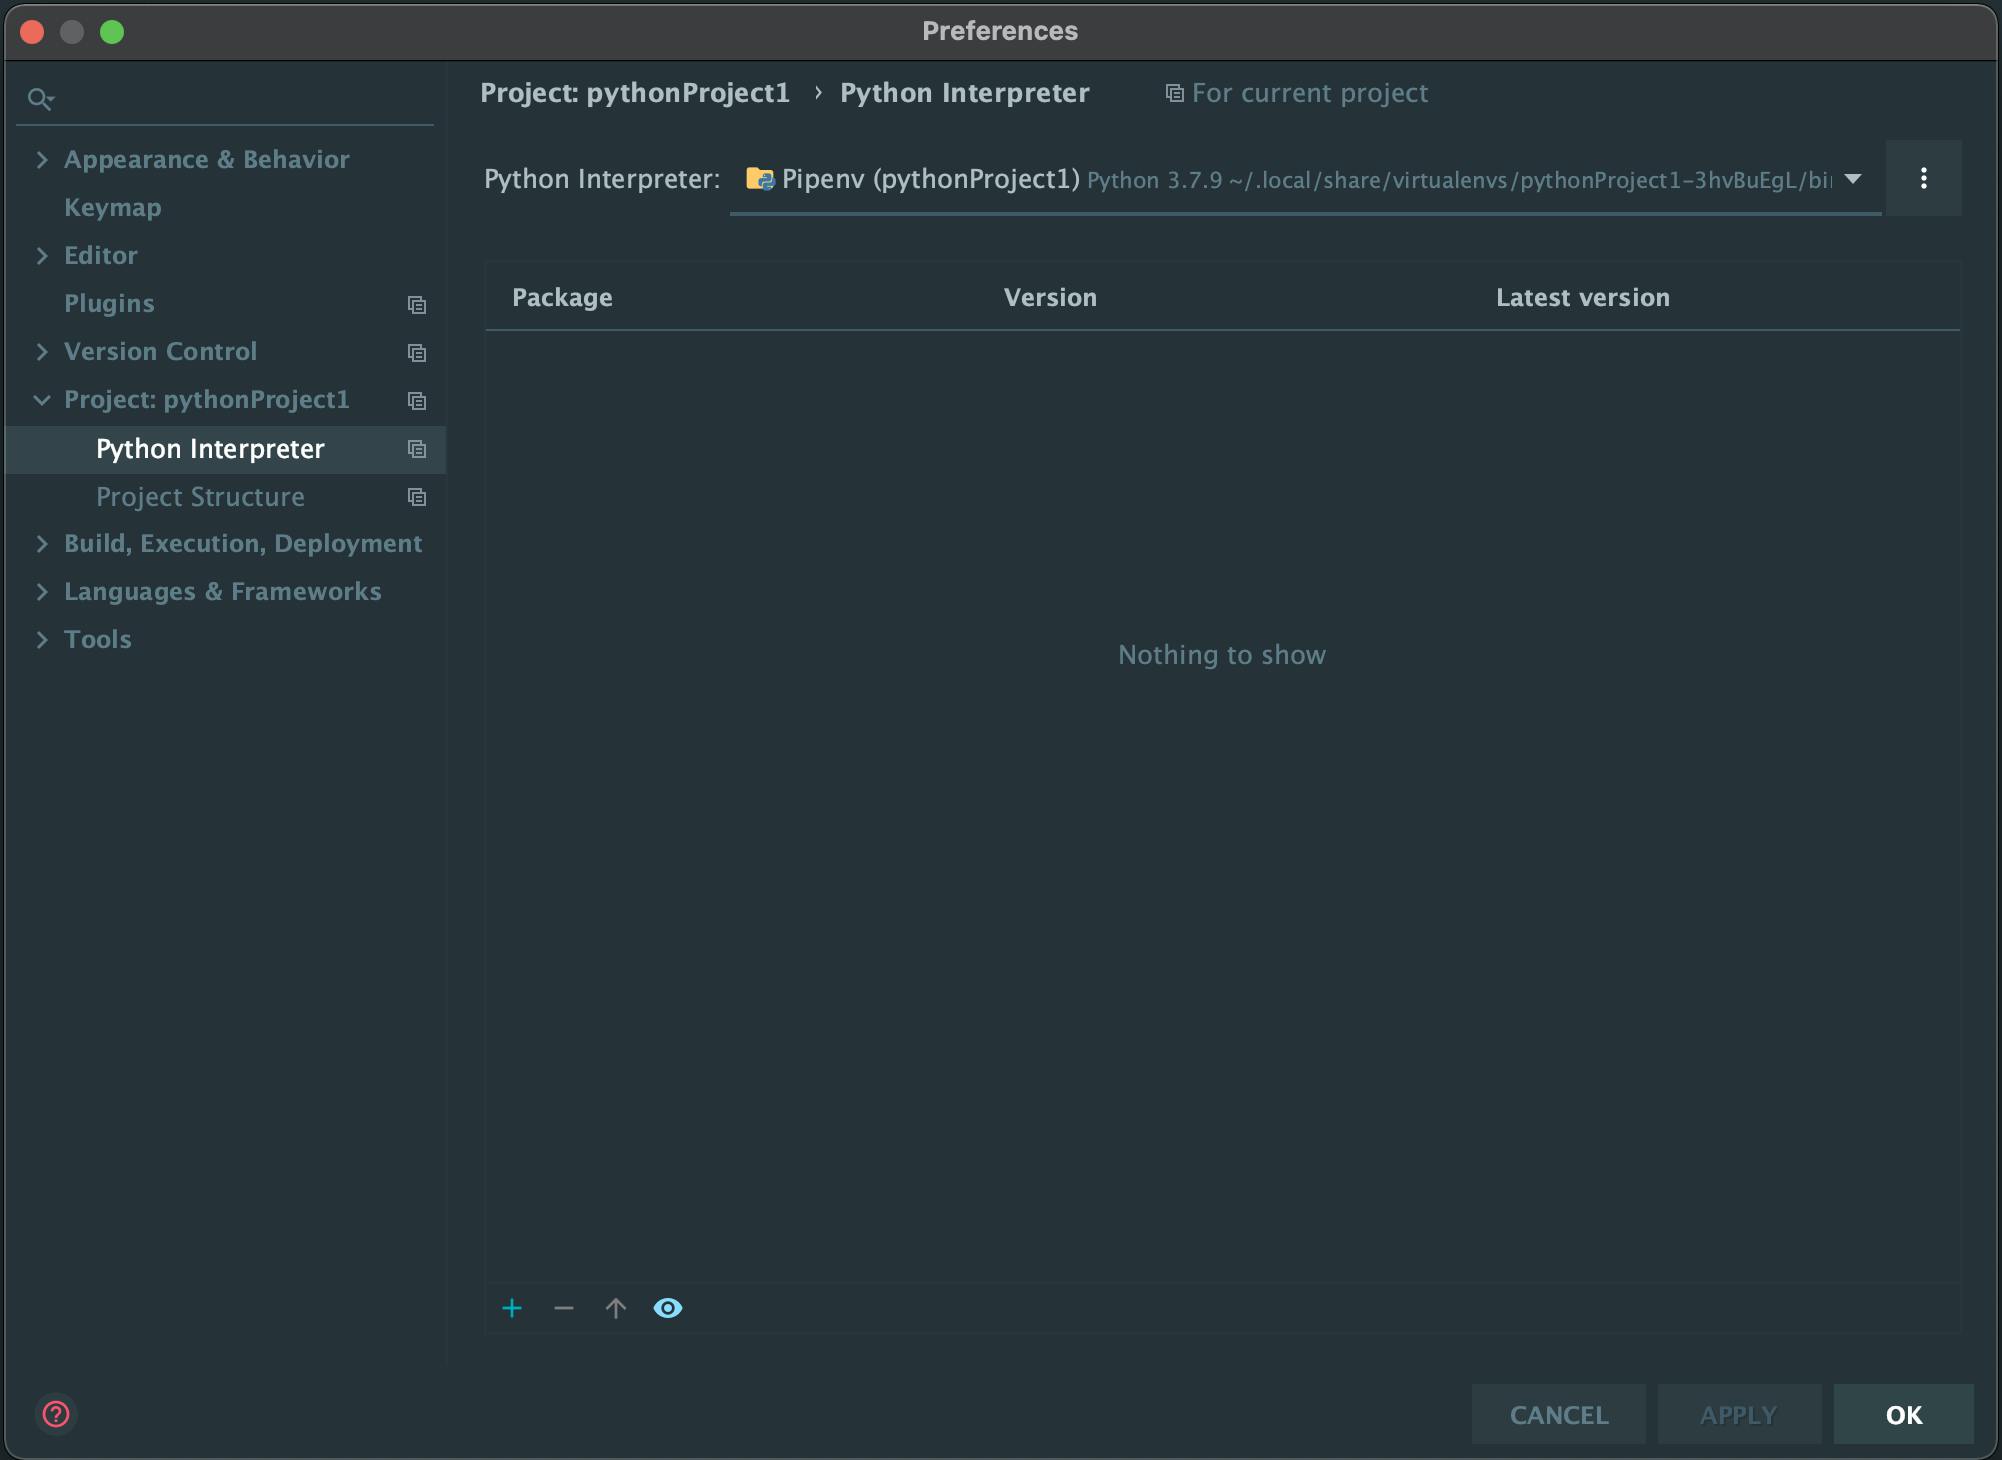
We will configure Pycharm to use our docker as a python interpreter. For that open the settings (File > Settings on windows, PyCharm > preferences on Mac OS) and open the python interpreter section in your project.
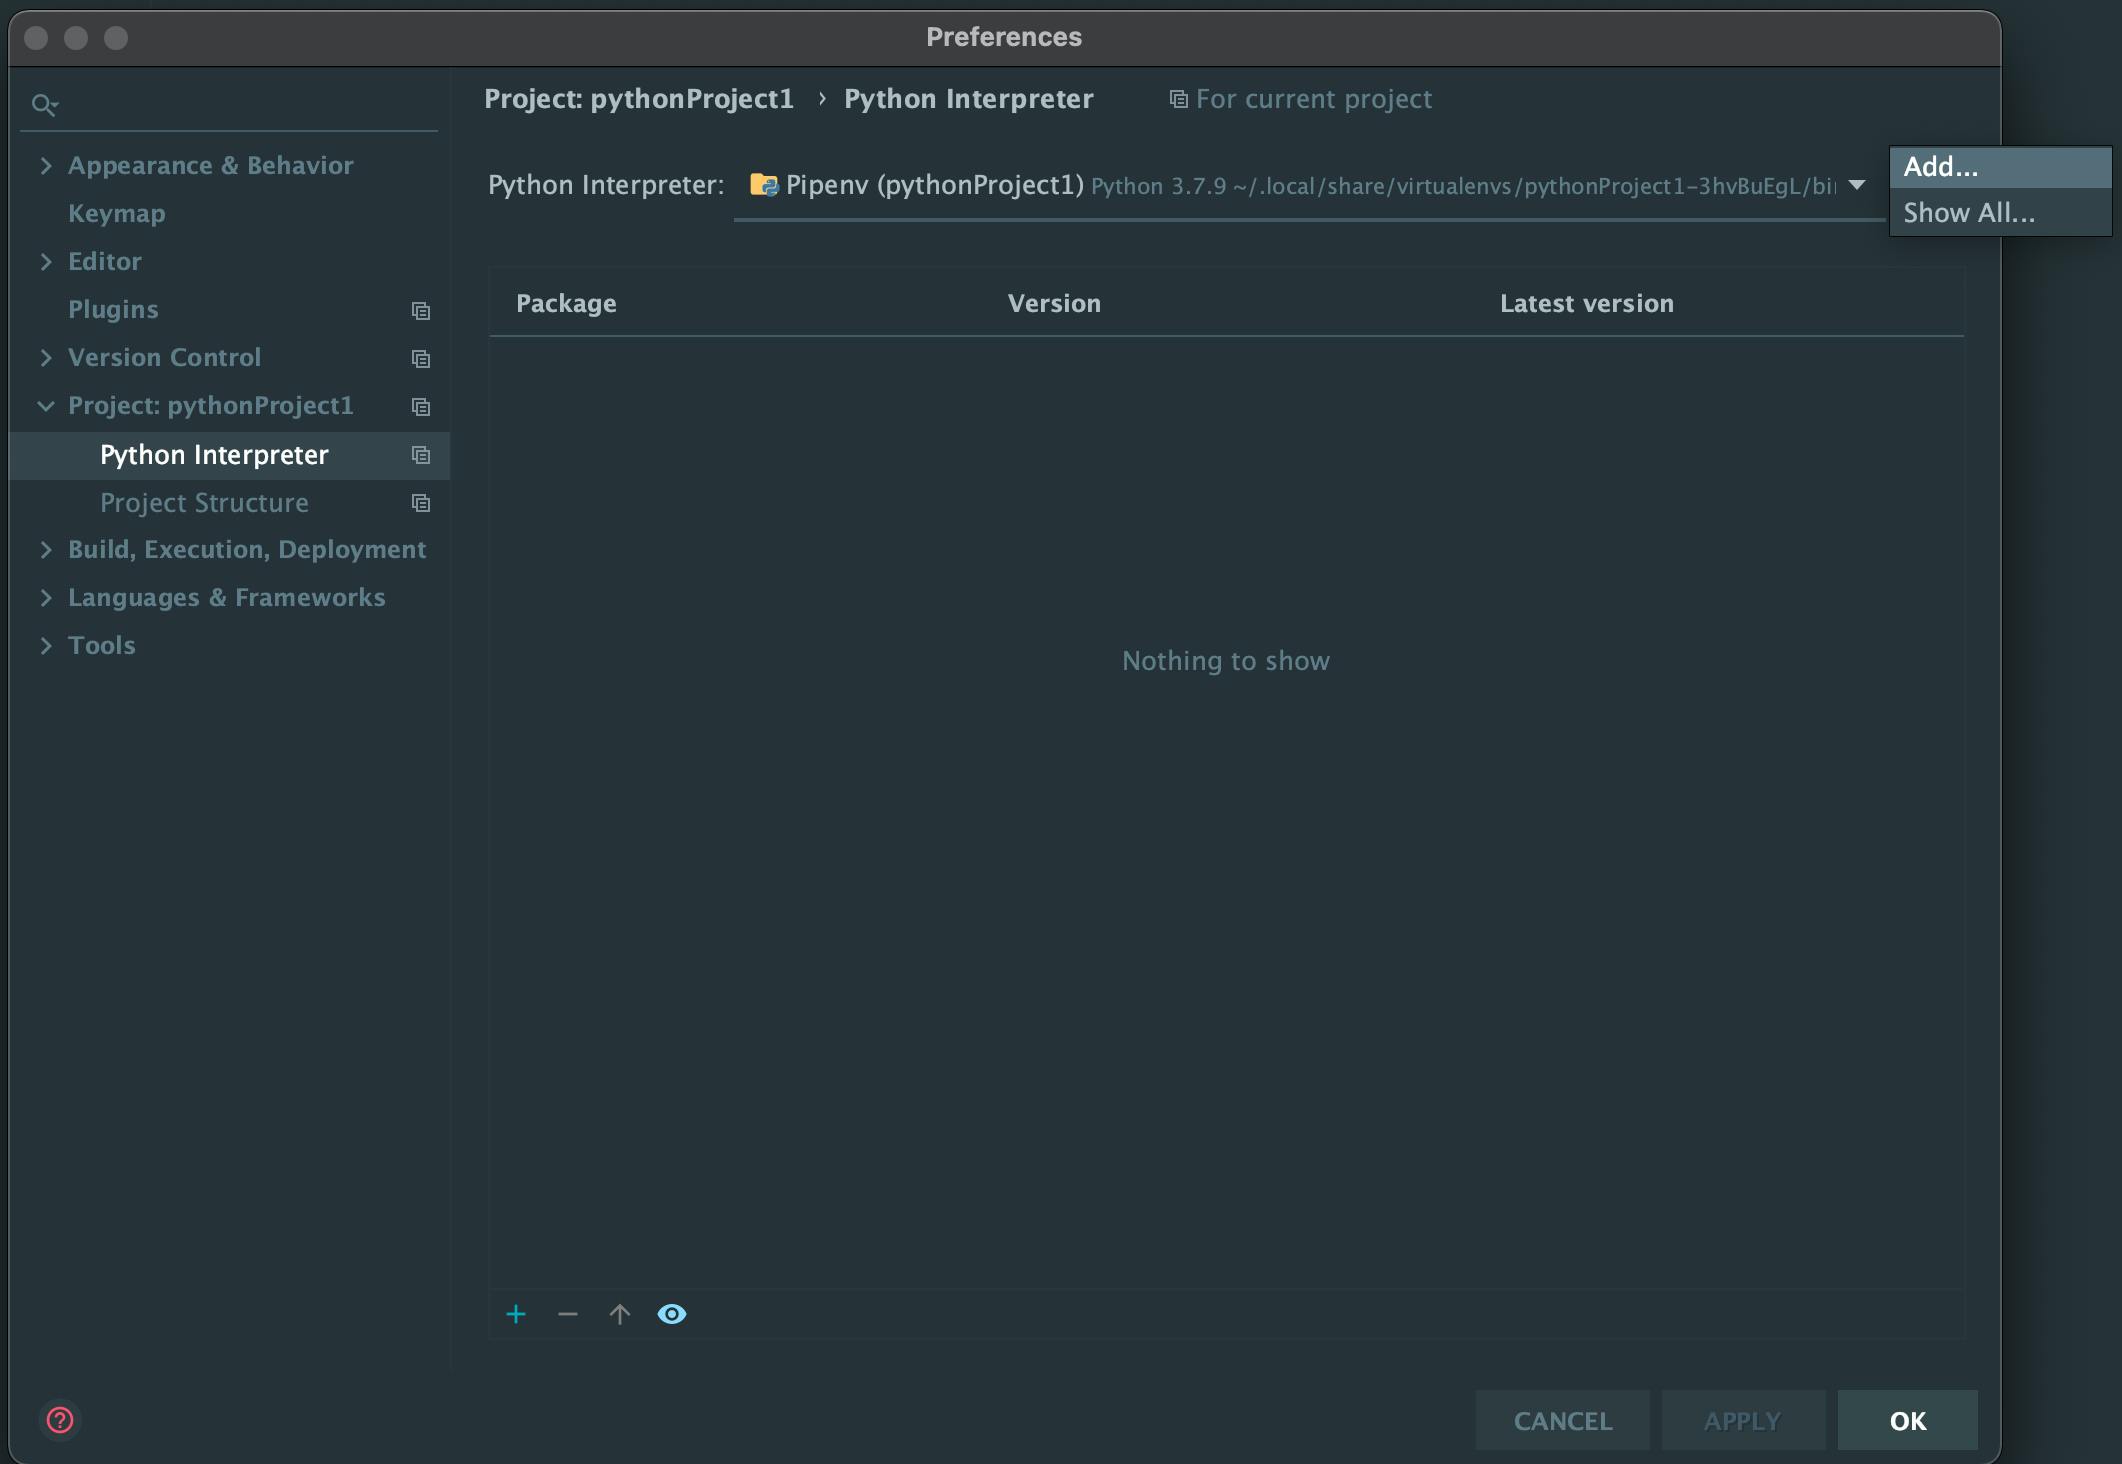
Click on the three dots on the right then add
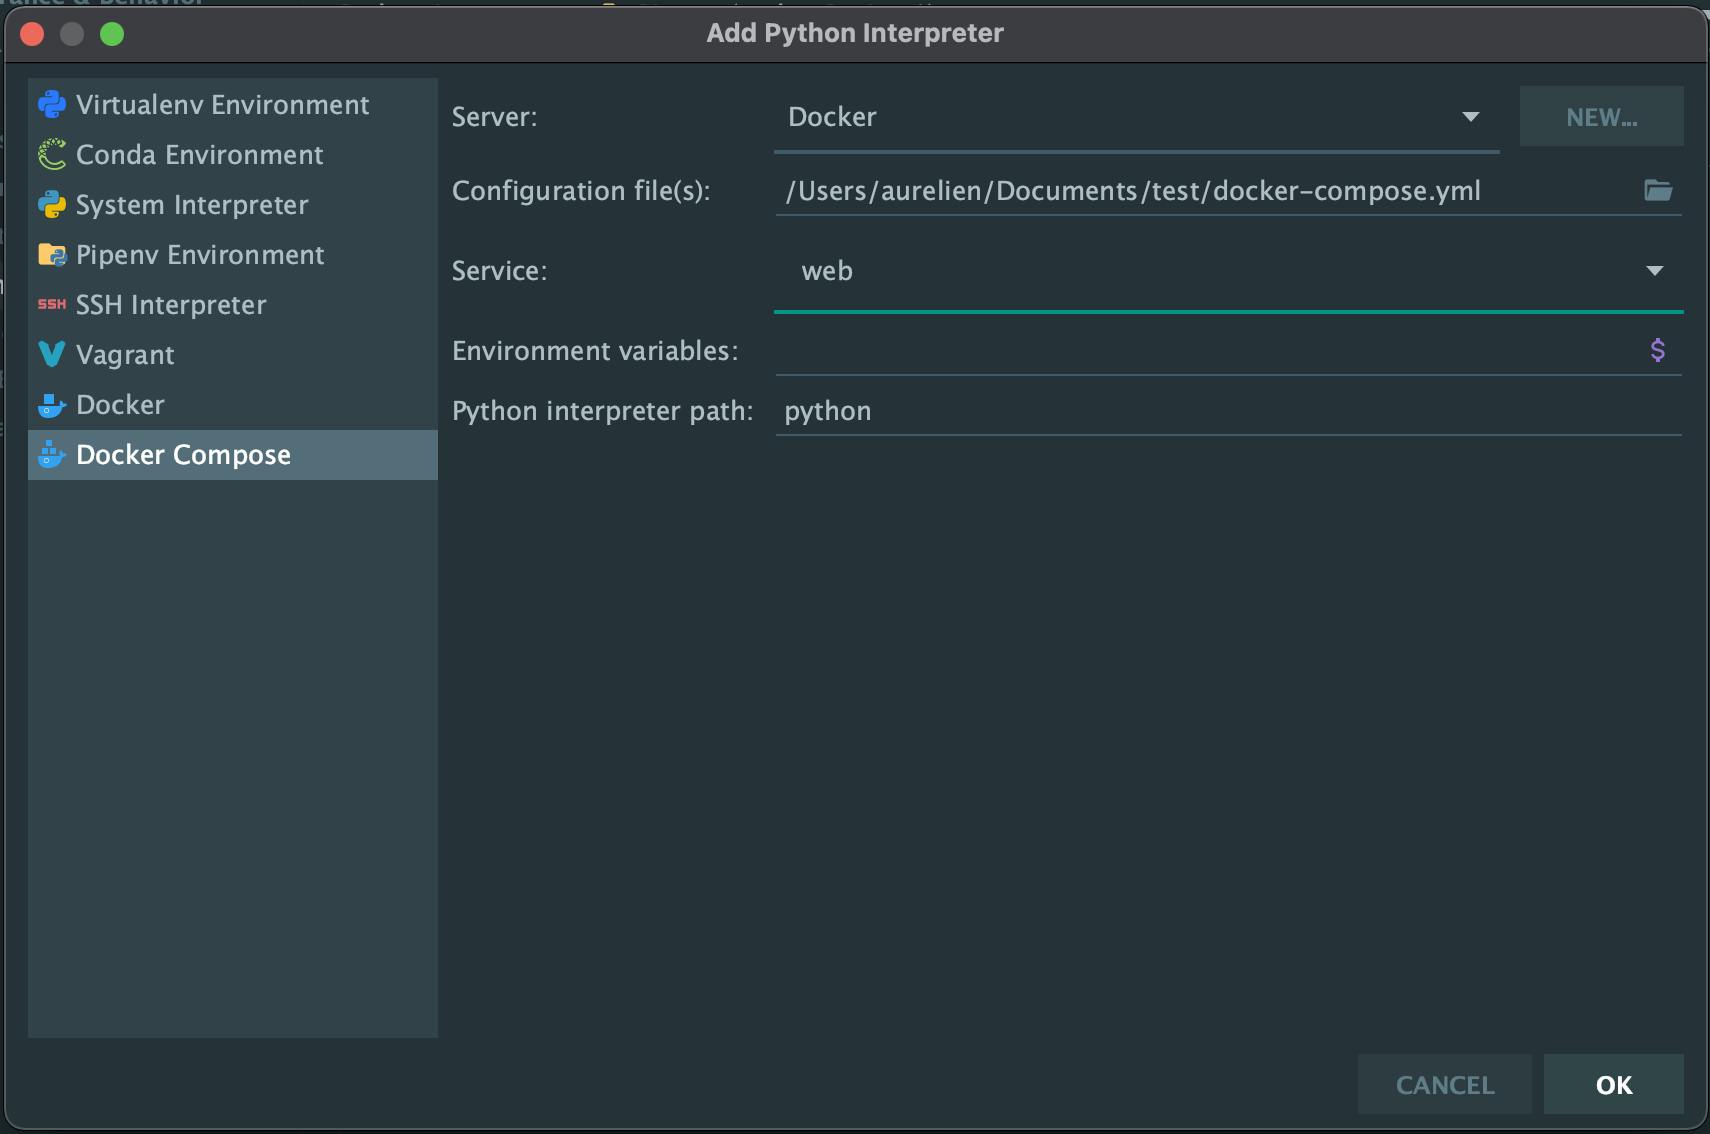
On the new window, select docker-compose, and select your docker-compose.yml file as a configuration file, then in service select web:
Click on ok and continue in the settings, going to Languages & Frameworks > Django. You can here enable the Django support:

You can now apply the settings and go back to your IDE main window.
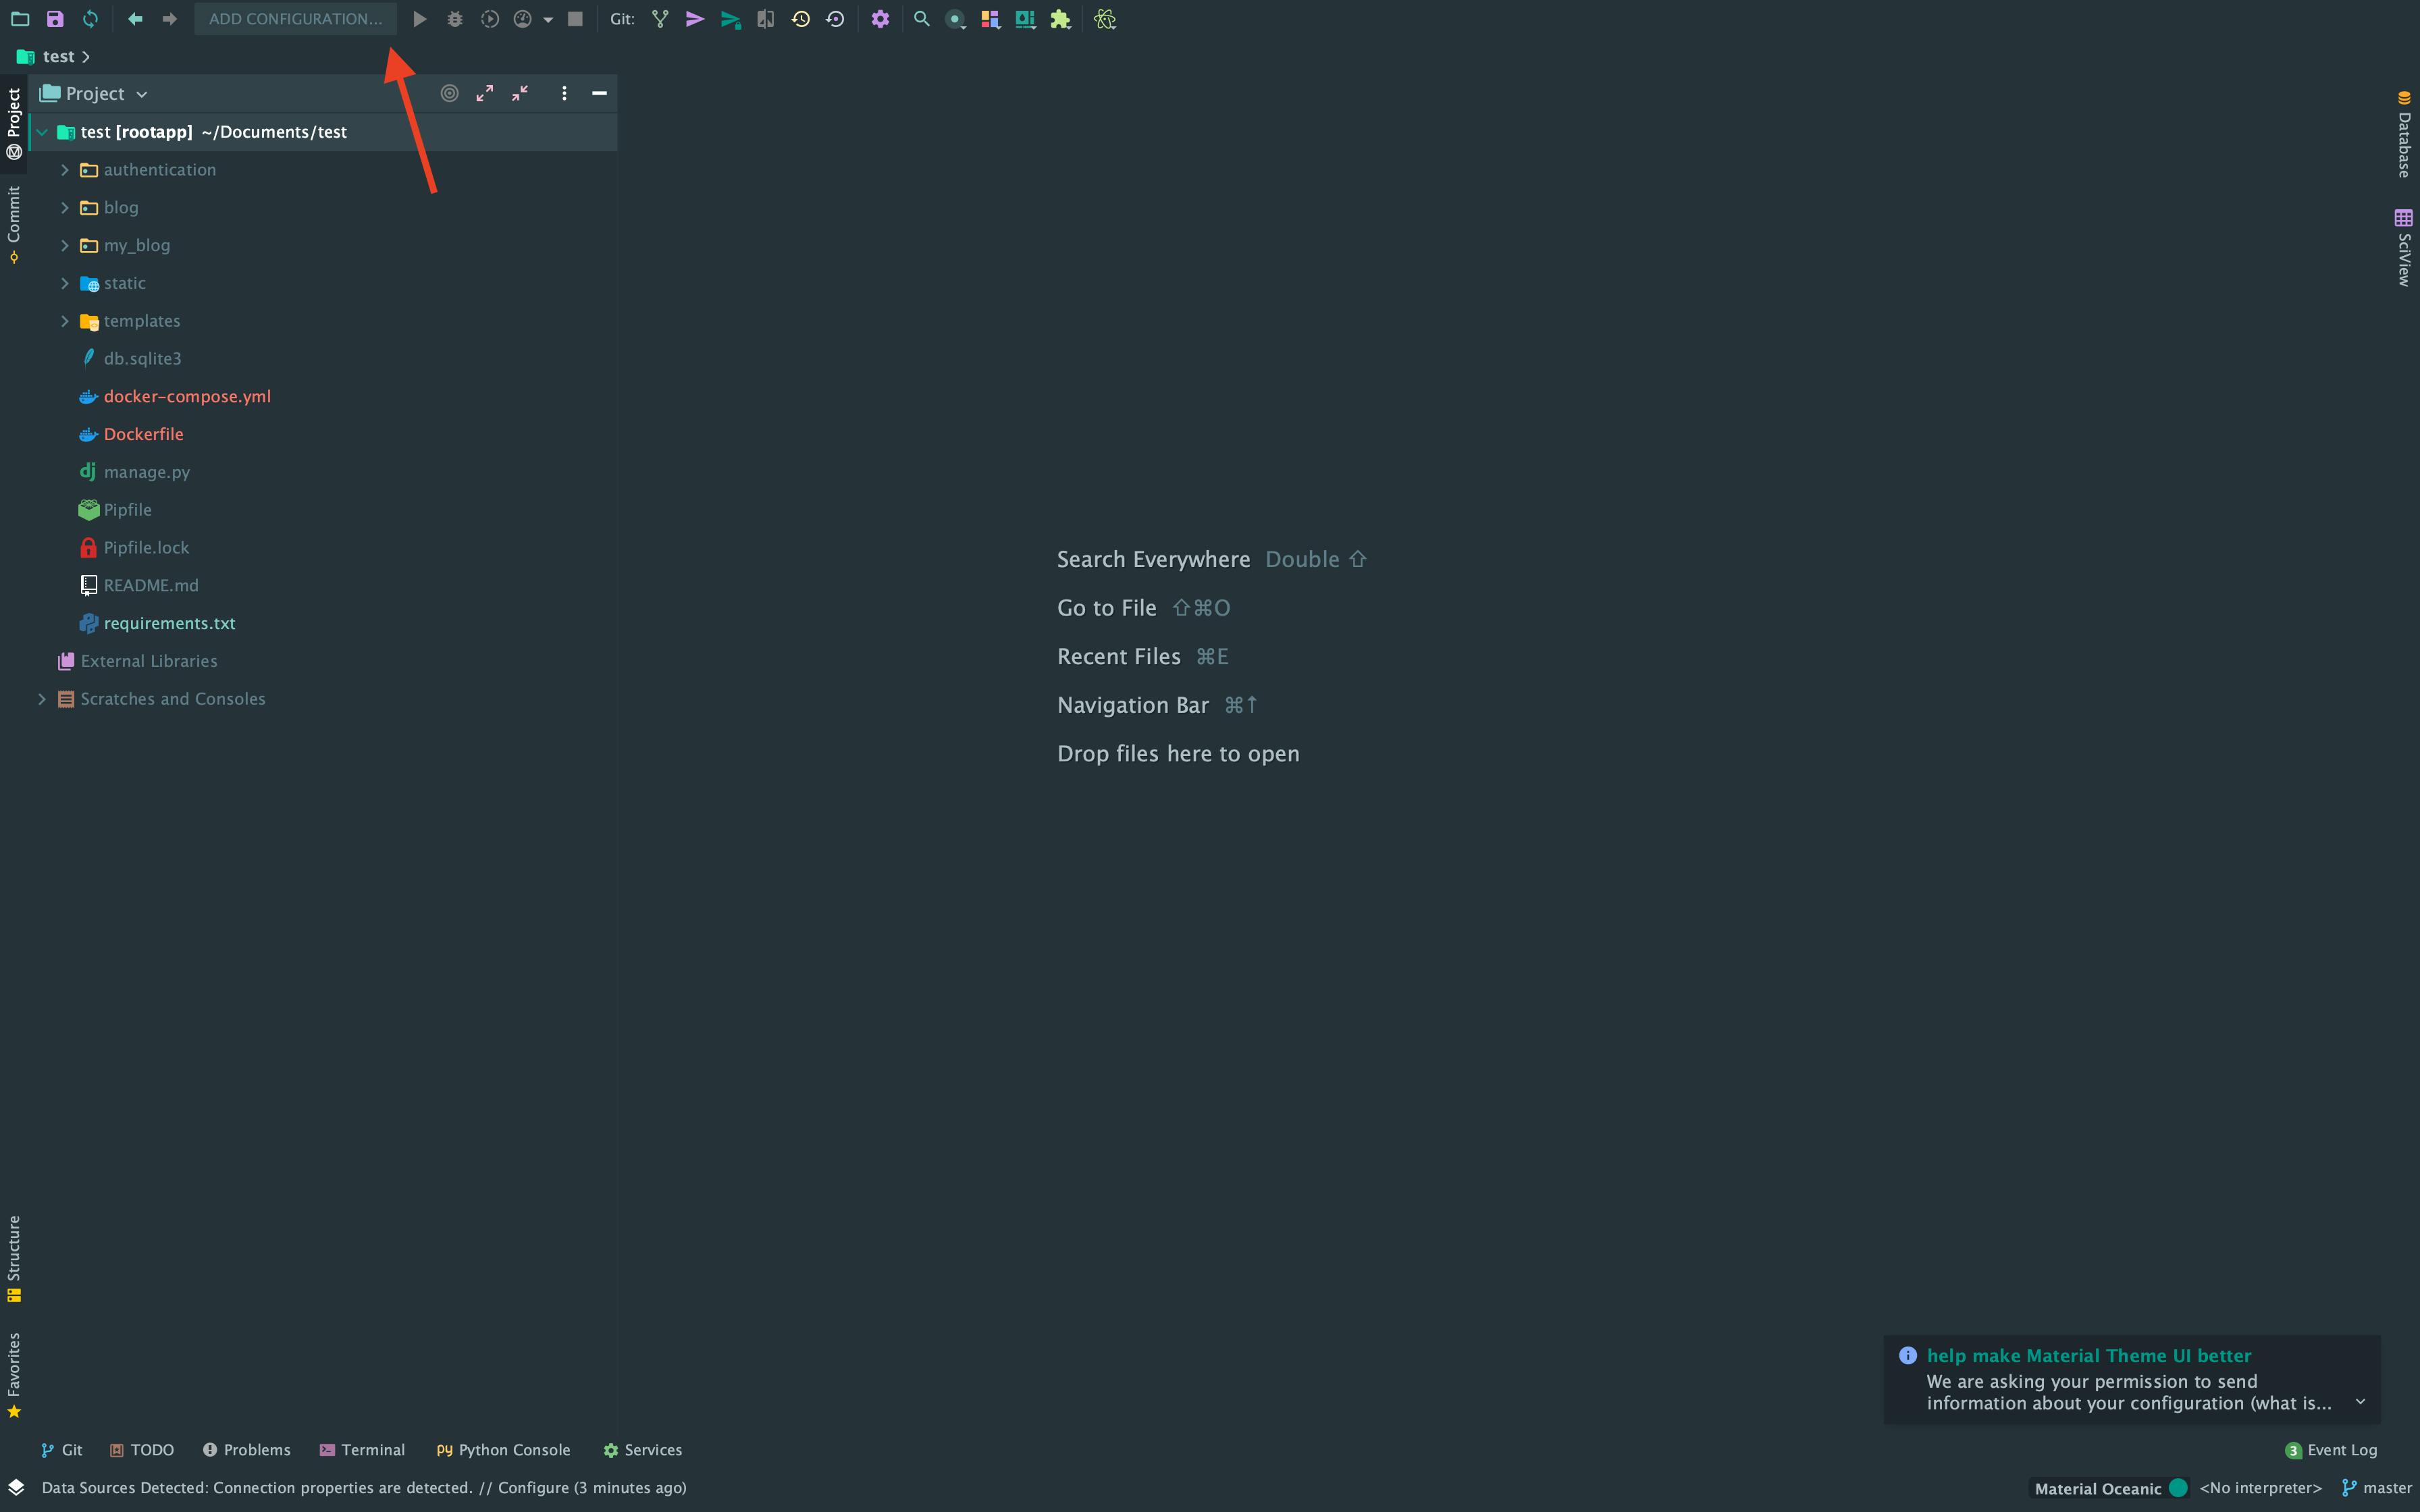
Add a configuration
Now the interpreter is ready, we have to tell Pycharm to use this interpreter for this project. In the top bar of your IDE you should see a Add configuration button:
Click on it, then on the blue '+' sign and select Django Server, finally fill the informations needed and select the interpreter we created previously as project interpreter:
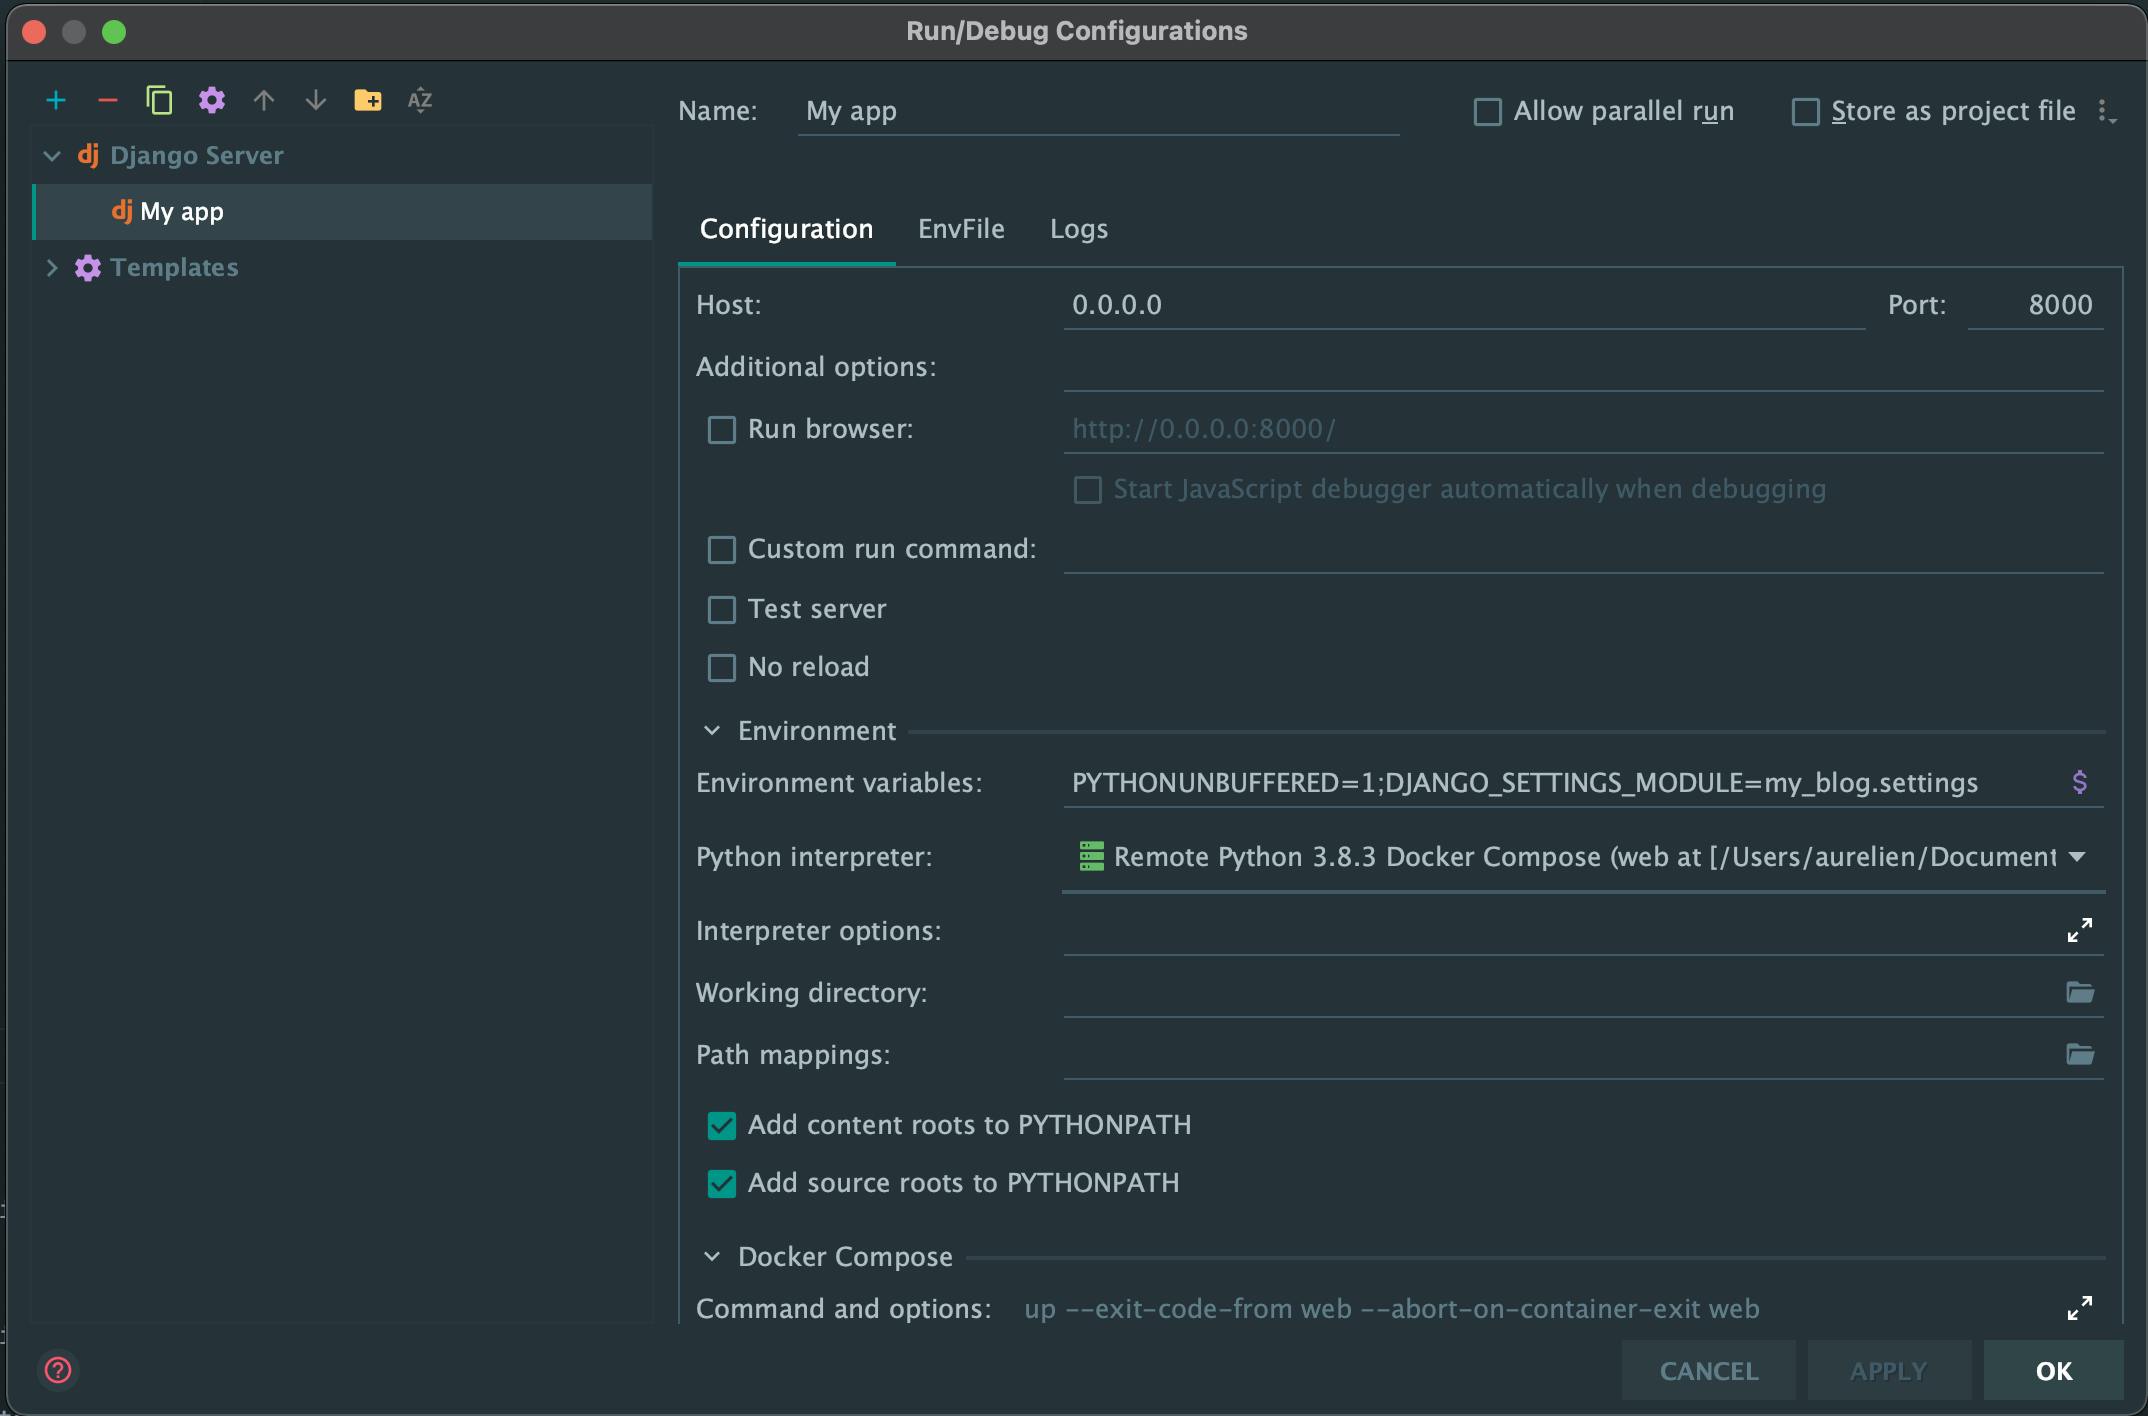
Then click on ok and the configuration is done. If you click on Run you dockers will be automatically mounted and you application is accessible.
Run manage.py commands through Pycharm
Running manage.py command for an application hosted in a docker is quite heavy, you have everytime to run
docker-compose exec YourServiceWeb python3 manage.py YourCommand
Thankfully Pycharm will make it easier. In the menu Tools you have now a Run manage.py Task option. This will open a new tab at the bottom of your IDE where you can execute directly the commands. In our case we want to migrate our migrations so just type migrate and the magic happen.
I hope you enjoyed this article and it helped you configuring your project. Feel free to leave a comment if you have any question.